Saturday, August 28, 2010

Menu Plan Monday- double dippin!

School started today and that makes me want to drag out my crock pot. Who cares if its 96 degrees and my kids are wearing tank tops. My fall decorations are rolling out Sept 1 and my crock pot is getting plugged in. ( I will just crank up the air, right?!?) To show that I am totally not all impractical, I will be double dipping meats in order to save time and money. Happy Eating y'all!


Monday: Beef Roast, garlic mashed potatoes, green beans, crescent rolls


Tuesday: Grilled chicken breasts, roasted carrots, broccoli, french rolls


Wednesday: Easy beef enchiladas (recipe below), re fried beans


Thursday: Leftover night...If you can find it, you can eat it but mama has the night off !!


Friday: Pizza Night!


Saturday: Basil, tomato, chicken pasta with fresh mozzarella, salad, garlic bread


Sunday: EASY Crock pot pork (Recipe tomorrow), peas, scalloped potatoes

Shredded Beef Enchiladas
3 c. shredded Cheddar cheese
10 flour tortillas
1 can enchilada sauce
1 can refried beans
1 1/2 lbs. shredded beef
1/2 c. chopped scallions or onions (optional)
1/2 c. sour cream (optional)
1/2 c. black olives (optional)
Dip flour tortillas in enchilada sauce, coating both sides (one at a time).

Fill with beef, beans and onions, putting filling to one side and rolling into enchilada. Secure with toothpick if necessary.

Place one at a time into 13x9 inch pan. Cover with shredded cheese. Bake at 350 degrees about 45 minutes.

Top with sour cream, olives, etc.

Friday, August 27, 2010

Momisms - Happy Friday!

Get while the gettin is good-

As in leave wherever you are while your children are still acting normal or pleasant.

As in leave the location before they get too tired, hot, cold, hungry, bored or overstimulated.

A fine line to walk especially with moms that don't know you and/or whose children is acting like angels.

Often heard being muttered as in " Should have left while the gettin was good" by tired stressed out moms who have lost all pride as they drag their tear ridden screaming child to the car.


Thursday, August 26, 2010

Freezer friendly recipe- Chicken Roccoco


This is the last freezer friendly recipe I will post this week I promise!!! It's more ingredients than I usually tolerate but its sounds so delicious that I have to try it. Happy eating!!

Chicken Roccoco
8 boneless, skinless chicken breasts
8 oz. pkg. cream cheese, softened
2 Tbsp. butter
1 onion, finely chopped
1 clove garlic, crushed
1 egg, beaten
2 Tbsp. milk
2 cups dried bread crumbs
1 cup wild rice
1 cup brown rice
1/4 cup butter
1/4 cup olive oil
1 green bell pepper, chopped
1 onion, chopped
1 cup chopped mushrooms
1/4 cup flour
1 cup chicken broth
1-1/2 cups half and half or whole milk


Flatten chicken breasts between waxed paper. In small saucepan, melt 2 Tbsp. butter and saute onion and garlic until tender. Remove from heat. In small bowl, combine cream cheese with sauteed onion and garlic and blend well. Divide mixture among the chicken breasts. Roll up each piece to hold filling.

Beat egg with milk. Dip each chicken bundle in egg mixture, then roll in bread crumbs. Chill in refrigerator for 1 hour.

Meanwhile, cook wild and brown rice in water to cover for 45 minutes. Drain off any remaining water.

Melt 1/4 cup butter and olive oil in large frying pan. Saute chicken bundles just to brown lightly. Remove chicken and set aside. In oil remaining in pan, cook green peppers, the second onion, and mushrooms until crisp tender. Add flour and cook and stir until bubbly. Add chicken broth and half and half or milk, stirring constantly until thickened and smooth. Combine rice mixture with this sauce and pour into 13x9" baking pan. Top with chicken bundles.

Bake at 350 degrees for 30-40 minutes until bubbly and chicken bundles are thoroughly cooked.
If you're going to freeze this dish, bake as directed, then cool completely in the refrigerator. Wrap well, label, and freeze up to 3 months. To thaw and reheat, thaw overnight in refrigerator. Bake at 350 degrees F for 40-45 minutes until thoroughly heated.

If you want to make this early in the day, fill the chicken bundles, roll in bread crumbs, and chill. Do NOT brown the chicken; never partially cook meat and refrigerate it to finish later. Make the rice mixture and sauce as directed; pour into casserole and chill. When you want to eat, saute the chicken bundles, place them on the rice, and bake as directed, adding 10 minutes to the baking time. 6-8 servings

Wednesday, August 25, 2010

Works for me Wednesday: School survival kit and craft in one!


I have noticed that the more activities that my #1 does that revolves around going back to school, the more excited and prepared he gets. We had a back to school party the other day with some friends and made some "school survival" bags.

The kids had a blast and it actually has a fundamental purpose!

I got quart size zip lock bags. I had the kids write their name in the white label part with permanent marker. (Good practice in writing skill, too!!)

Then I let them go crazy with school school themed stickers I picked up from the dollar store.

They stuffed them with fun themed band aids, antibacterial and packs of buzz light year tissues.

They keep them in their book bags so they are always there when runny noses, crying jags, dirty playground equipment or skinned knees occur!

And that totally works for this mama!!!


For other great WFMW ideas be sure to visit We are That Family!!

Tuesday, August 24, 2010

Recipe Tuesday: Santa Fe Chicken- freezer friendly!


I will be back next week with healthy diabetic friendly recipes but this week I am focusing on freezer friendly meals. The fact that I can double the recipe and put it in the freezer for another day is very appealing to this tired mama! Hope this is as yummy as it sounds!


Santa Fe Chicken

1 onion, chopped
3 cloves garlic, minced
1 Tbsp. olive oil
9 oz. pkg. frozen fully cooked diced chicken
2 (15 oz.) cans black beans, drained and rinsed
24 oz. jar thick and chunky salsa
1 cup taco sauce
8 corn tortillas
1 cup sour cream
2 cups shredded Cojack cheese


In medium microwave safe bowl, cook onion and garlic in olive oil on HIGH for 2-3 minutes until tender. Stir in frozen chicken, black beans and salsa. (If freezing, cool onion and garlic mixture before adding frozen chicken.)


In 2 quart glass baking dish, pour taco sauce. Lay four corn tortillas over sauce. Top with half of chicken mixture. Spoon on half of sour cream in small dollops. Sprinkle with half of cheese. Top with remaining tortillas, chicken mixture, sour cream and cheese. Cover with foil. At this point, you can wrap the casserole well and freeze up to 3 months.


Bake at 350 degrees for 25-35 minutes until bubbly. Uncover and bake 5-10 minutes longer until cheese is melted. If frozen, thaw casserole overnight in refrigerator, then bake covered at 350 degrees for 35-45 minutes until bubbly; uncover and bake 5-10 minutes longer until cheese melts. Serves 6

Sunday, August 22, 2010

Menu Plan Monday: Hunker down and freeze!

My #1 starts school at the end of this week. Cue T-ball and dance lessons the week after. It makes this mama a little nervous. As in how to feed my family good food...fast! So I am officially dubbing this week freezer meal week. I found some great freezer friendly recipes that I plan on doubling and freezing. That will make 3 freezer meals.....can I get a woohoo?! Happy eating y'all!!


Monday: Goulash (Recipe below), garlic bread, salad


Tuesday: Santa Fe Chicken (Recipe Thursday), Mixed veggies


Wednesday: Leftover Buffet- if its not movin, you can eat it...but mama is not cookin!


Thursday: Egg salad croissant sandwiches, spinach salad


Friday: Pizza Night!


Saturday: Chicken Rococco (Recipe Friday), Green beans, roasted carrots


Sunday: BBQ pork chops, corn on the cob, broccoli


Goulash

1 large onion, chopped
2 garlic cloves, minced
1 tablespoon olive oil
1 lb ground beef, browned and drained
2 (16 ounce) cans stewed tomatoes
1 (16 ounce) can water or tomato juice
8 ounces elbow macaroni, raw
salt
pepper
Parmesan cheese


Saute onions and garlic in olive oil until translucent.

Brown ground beef and drain.

Add ground beef, tomatoes, water, raw macaroni, salt and pepper to the onion and garlic mixture.

Cook for 15 to 20 minutes or until macaroni is tender.

If desired, top with Parmesan cheese.

Serve with crusty bread and a salad.

Saturday, August 21, 2010

What to plant in your FALL garden!


I love love love fall!!!! I drag out all my lovely decorations and watch football and cook soup.
Whats not to love?!?!

This year I am interested in planting a fall garden. Not only will it cut my grocery budget but it will also provide some fresh new veggies for my table!

If you were wondering like me what there is plant in the fall, here you go!


* Snap peas and snow peas
* Broccoli
* Cabbage
* Collards
* Cauliflower
* Brussels Sprouts
* Bok Choy
* Carrots
* Parsnips
* Beets
* Onions
* Spinach
* Lettuce
* Rutabagas, turnips


Happy Planting!

Thursday, August 19, 2010

Sometimes its about survival


Don't you just love the airline stewardess?

I especially love the very practiced safety speech they give at the beginning of the flight. The two finger pointing to the emergency exits, pulling on the yellow inflatable life vest, the example of the flotation device that is currently your seat. (All while having a picture perfect smile and make up too , I might add!)

My very very favorite part of their spiel is something I find fascinating. When it comes to cabin pressure. When the cabin pressure drops, these little mask things fall from the heavens. The airline stewardess then says the most shocking thing. They instruct you to first place the life giving mask on your face before you place it on your child's mouth.

My first gut reaction is that of disbelief! My child comes first. I want to take care of my child first.

This is the way of the mama, isn't it? We love these little blessings and its our job to take care of them and their needs.

But sometimes , I have come to realize, its about survival.

If you would place that mask around your child's mouth first, then you risk running out of air and dire consequences would surely follow. Who would then take care of your loved ones? What would happen to them?

If you would first get the crucial air that you need then you could have the resources to then take care of all your loved ones. You could keep going.

This is a lesson that God is really showing me about this week. I am trying to take care of everyone. Everyone that is but myself. No one is going to come into this home and make me take a bubble bath or go for a long walk or a dinner out with some good girlfriends. I am starting to figure out that I am going to have to claim this time as my own. Even fight for it sometimes. Not to be selfish but to survive.

So many times this week alone, I have pushed my daily devotional to the side because the kids need me. But I have come to realize that I need my Father too. Until I am filled up myself, I am empty to fully give back to those I love the most. Its not selfish because in the end I am a better mama, friend and lover. I am filled and fulfilled and I am free to pour out.

So I am going to start to try to look at time with a good girlfriend as a huge giant oxygen mask that is being dropped from the sky. Or at least that is what I will tell myself as I pay the babysitter :)

Wednesday, August 18, 2010

Works for me Wednesday: Keeping healthy choices front and center!


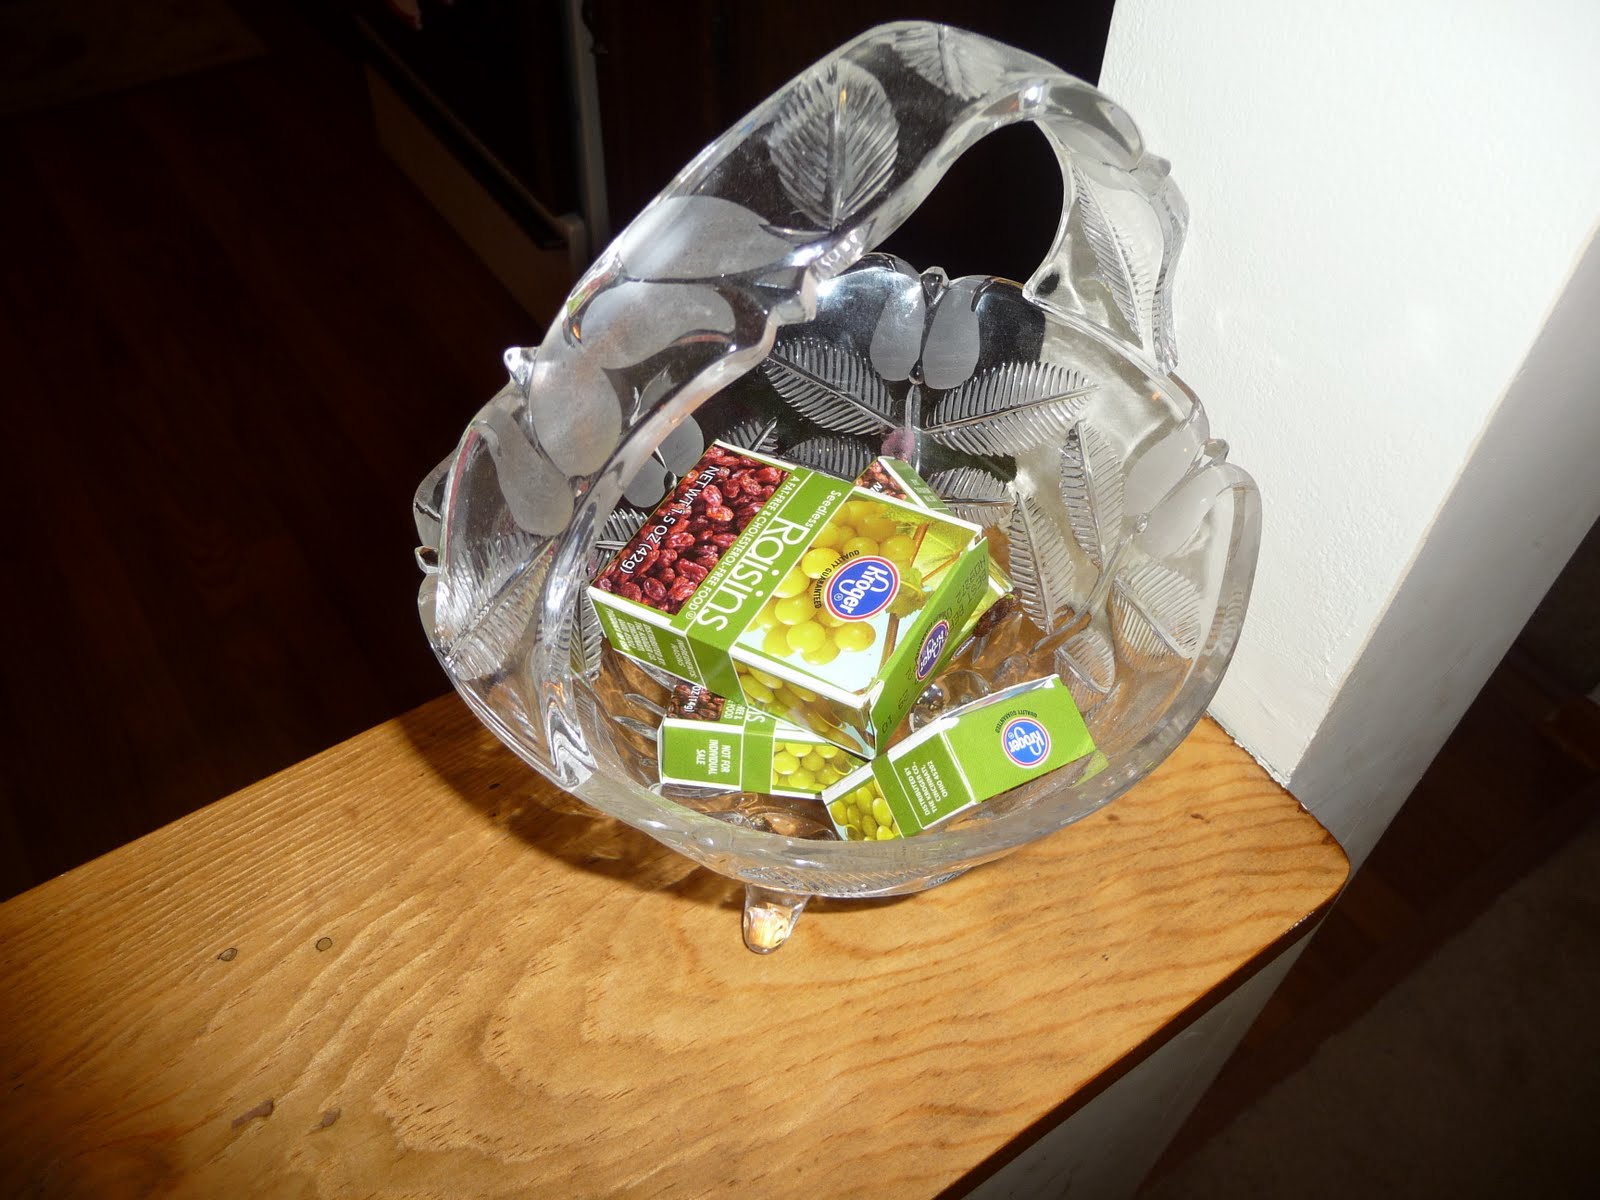
I have a lovely crystal "basket" on my kitchen ledge. I used to fill it with M&M's, Hershey Kisses and whatever other treat was in season. I had candy corn in the fall, red and green bells at Christmas and pastel candies in the spring. I loved it.......so did my kids.

When I started to see chocolate rings around their mouth when I had not granted permission, I knew things had to change.

One night after the little buggers went to bed, I switched out their M&M's with boxes of raisins. (Yes, I am super sneaky like that!) They noticed the next day but I got the surprise of my life when they simply grabbed the box and started munching away. I thought for sure I would encounter some sort of moaning or gnashing of teeth.


Could it be that they simply ate whatever was in front of them and convenient?!

A couple weeks later I filled a cookie jar with granola bars, dried fruit and nuts and placed it on the pantry floor. I told them when they wanted a snack they could grab one out of Pooh without permission.


It has worked beautifully. They feel big getting their own snack and I feel good knowing that they are filling those little bodies with good things to eat.
And that works for this mama......(who still sneaks M&M's when they nap. SHHHHHH!!!! )


For more great WFMW ideas visit We are That Family!

Tuesday, August 17, 2010

Tasty Tuesday recipe- Broiled Coconut Tilapia - Diabetic Friendly!!


For the next couple of weeks I am going to be posting diabetic friendly recipes on Tuesdays. I have several family member that struggle with diabetes and I had gestational when I was pregnant with number 1. :) Since then I have realized that eating the diabetic diet not only keeps me healthy it also helps me lose weight when I can stick with it. (Insert will power here..... ) So here is a tasty recipe that I hope is as yummy as it sounds!


Broiled Coconut Tilapia

4 tilapia or other white fish fillets
1/2 cup lemon juice
1/4 cup orange juice
2 tablespoons coconut or cooking oil
Paprika
Dash seasoning salt
Ground black pepper
Snipped fresh parsley


Marinate fillets in lemon juice and orange juice for 20 minutes in the refrigerator. Heat oven 425 degrees Take fish out of marinade and arrange on a broiler pan (discard marinade). Drizzle fish with oil. Season lightly with paprika and salt. Broil 4 inches from the heat for 4 to 6 minutes per 1/2-inch thickness of fish. Sprinkle with pepper and parsley before serving.

Monday, August 16, 2010

Menu Plan Monday- Use those Potatoes!

Hey girls!! We are just coming off a lovely week at the lake and I came back to a HUGE bag of potatoes that need to be used! If you have read this blog, even one time, you know I hate to waste ANYTHING!!! So I rolled up my sleeves and planned a menu that would use every last little potato and be delish at the same time! The potato soup is perfect in trying to have one meatless meal a week and I can freeze half of it to give a friend after her baby comes! Check out the potato recipes at the bottom! Happy eating Y'all......

Monday: Cheddar potato soup, cheddar biscuits, tossed salad with cherry tomatoes

Tuesday: Chicken kabobs w/ potatoes, peppers, mushrooms and onions, corn on the cob,
spinach salad


Wednesday: Leftovers- If its not movin, you can eat it...but mama is NOT cookin!


Thursday: BBQ pork chops, skinny scalloped potatoes, peas


Friday: Pizza Night!

Saturday: Baked penne pasta, garlic bread, green beans

Sunday: Marinated steak, rosemary potatoes, roasted peppers, salad


Cheddar potato soup

1 large onion, chopped
3/4 cup chopped celery
1/4 cup butter
5 cups cubed peeled potatoes
3 cups water
3 cups milk, divided
4 teaspoons chicken bouillon granules
1/2 teaspoon salt
1/2 teaspoon pepper
1/4 cup all-purpose flour
4 cups (16 ounces) shredded cheddar cheese

In a large soup kettle, saute onion and celery in butter for 5 minutes. Add potatoes and water. Bring to a boil. Reduce heat; cover and simmer for 15 minutes or until potatoes are tender.

Stir in 2 cups milk, bouillon, salt and pepper. Combine flour and remaining milk until smooth; gradually stir into soup. Bring to a boil; cook and stir for 2 minutes or until thickened. Reduce heat. Add cheese and bacon; stir until cheese is melted.

Skinny Scalloped Potato's
1 tablespoon olive oil
1 1/2 cups Chicken Broth
1 cup low-fat (1%) milk
2 1/2 tablespoons flour
1/2 teaspoon basil
2 pounds potatoes, peeled
1/2 cup shredded low-fat cheese of choice

Preheat oven to 375 degrees F. Rub oil over 9x13-inch baking dish.

Thoroughly mix broth, milk, flour and basil together in saucepan; cook over medium-low heat 3 to 5 minutes or until thickened; set aside.

Cut potatoes into 1/8-inch thick slices. Place half of the potato slices in overlapping pattern in baking dish. Salt and pepper to taste. Spoon half the broth mixture over the potatoes. Repeat.

Cover and bake 30 minutes. Sprinkle with cheese; bake, uncovered, 15 minutes longer or until potatoes are tender and cheese is lightly browned.

Wednesday, August 11, 2010

Works for me Wednesday- Back to school craft that can actually be used!


I am always looking for ways to get my son prepared to go back to school. We love anything that gets him excited for the big day. Last year we did a craft that went over so big I thought I would share it again :)

I get out my brown paper bags, markers, crayons, stickers, glitter....whatever is in the craft area!

I then let my kiddos decorate the bags anyway they would like and as many as they would like.

They have a ball and when it comes time to pack a lunch they get to pick one of their very festive bags to carry it in. It makes them feel special and buys this mama at least 20 minutes to do something for myself...you know like pick up the house. :)


For more great WFMW ideas, visit We are That Family!

Tuesday, August 10, 2010

Recipe Tuesday: Chicken Cacciatore- diabetic friendly!


For the next couple of weeks I am going to be posting diabetic friendly recipes on Tuesdays. I have several family member that struggle with diabetes and I had gestational when I was pregnant with number 1. :) Since then I have realized that eating the diabetic diet not only keeps me healthy it also helps me lose weight when I can stick with it. (Insert will power here..... ) So here is a tasty recipe that I hope is as yummy as it sounds!


Chicken Cacciatore

Per serving: 184 calories (26% calories from fat), 19 g protein, 5 g total fat (1.1 g saturated fat), 13 g carbohydrates, 3 g dietary fiber, 67 mg cholesterol, 216 mg sodium
Diabetic exchanges: 2 1/2 lean protein, 1 carbohydrate (3 vegetable)


8 5 ounce bone-in chicken thighs
1 tablespoon olive oil
1 cup chopped onion
2 large cloves garlic, minced
1 medium red bell pepper, seeded and chopped
1/2 pound fresh mushrooms, sliced
1 quart Home-Style Tomato Sauce
2 teaspoons crushed dried oregano
1 teaspoon crushed dried basil
1 cup dry white wine or water
1/4 cup chopped flat-leaf parsley
4 black ripe olives, sliced


Remove and discard chicken skin and any visible fat. Rinse chicken pieces and pat dry with paper towels.

Heat the oil in a large nonstick skillet. Add chicken pieces and brown on both sides, about 7 to 8 minutes total. Transfer chicken pieces to two 8-inch square foil pans, 4 chicken pieces per pan. Set aside.

Add onion, garlic, bell pepper, and mushrooms to the skillet and sauté over low heat, stirring occasionally, until onion is limp and liquid has been absorbed, about 10 minutes.

Stir in reserved tomato sauce, oregano, basil, wine, and parsley. Cook, stirring occasionally, until sauce flavors blend, about 15 minutes. Remove from stove and cool for about 15 minutes.

Spoon sauce equally over the reserved chicken pieces and top each with half of the olive slices. Cover and seal with aluminum foil. Label and date. Freeze until firm.

When ready to bake, preheat oven to 375°F (190°C), Gas Mark 5. Bake the dish, covered, until sauce is bubbling and chicken is no longer pink at the bone, about 1 hour.

Monday, August 9, 2010

Menu Plan Monday- Eating fresh!


We will be visiting Lake Erie this week and I am super excited to get away with my family! It also gives us the opportunity to try some grilled recipes and also to get some great fresh food at the farmers stands! (In which we will have our meatless meal :) ) I am excited for fall but I have to tell you that I love all this fresh food!! Happy eating y'all!

Monday: Blackened walleye, grilled asparagus, baked potatoes

Tuesday: Shredded pork tacos with fresh salsa, black beans, Spanish rice

Wednesday: Fresh green beans cooked with ham hock, corn on the cob, grilled
zucchini, sliced garden tomatoes

Thursday: Burgers, corn on the cob, salad and grilled fries (see recipe below)

Friday: Pizza Night!

Saturday: Spaghetti and cheese filled meatballs, spinach salad, garlic bread

Sunday: Chicken stir fry over brown rice and veggie egg rolls

Grilled French Fries
1 bag of frozen French fries
1/4 to 1/2 tsp. dried dill
2 to 3 tbsp. creamy Italian dressing
1 to 2 tbsp. minced onion
1/2 c. grated Cheddar cheese, RESERVE


In large bowl, mix all ingredients (except cheese) and put in a double foil packet, sealing edges tightly. Grill over hot coals for 10 to 15 minutes. Turn packet over and punch holes in foil to vent steam. Grill 10 to 15 minutes more. Open packet carefully because of steam, place French fried in a warmed serving dish and toss with 1/2 cup of grated cheddar cheese.